
Normally I have this help document up shortly after Apple updates OS X. This one took a little while longer because the answer was already posted in the comments for the post on how to change the sort order for Yosemite. The biggest change we've seen in El Capitan is OS X's System Integrity Protection. This new feature helps protect your Mac from malicious software. It also makes some common customization steps a little trickier.
Here's how to change Finder.app sort order in OS X El Capitan.
Required Tools:
- BBEdit - My go to file editor. ($)
- Plist Editor - Part of Apple's Xcode tool set.
- A recent back-up. 1
Note: Some posts have stated Text Wrangler (kind of a BBEdit lite) will work. My testing has shown Text Wrangle does not work to edit plist files. Use BBEdit or the Xcode tool. Anything else and you risk corrupting the plist file and borking your Finder.app settings.
Update Steps:
Before beginning, please-please-please back up your Mac. One of the common issues I've had with this process is helping people fix a corrupted InfoPlist.strings file after trying to make the changes.
- From the desktop, click the menu and select 'Restart...'.
- As soon as your Mac starts to restart, hold down the Cmd-R keys to boot into Recovery mode.
- Click the 'Utilities' menu and select the Terminal command.
- Enter the following command in the Terminal windows:
csrutil disable. You will be alerted that your Mac needs to restart for the change to take effect. - Click on menu again and select Restart.
- After you Mac restarts, open Finder and navigate to
/System/Library/Coreservicesfolder and locate the Finder application. Use Shift-Cmd-G in Finder.app and enter the path above to easily locate the right spot. - Once the folder is open, right click on the Finder.app file and click on ‘Show Package Contents’.
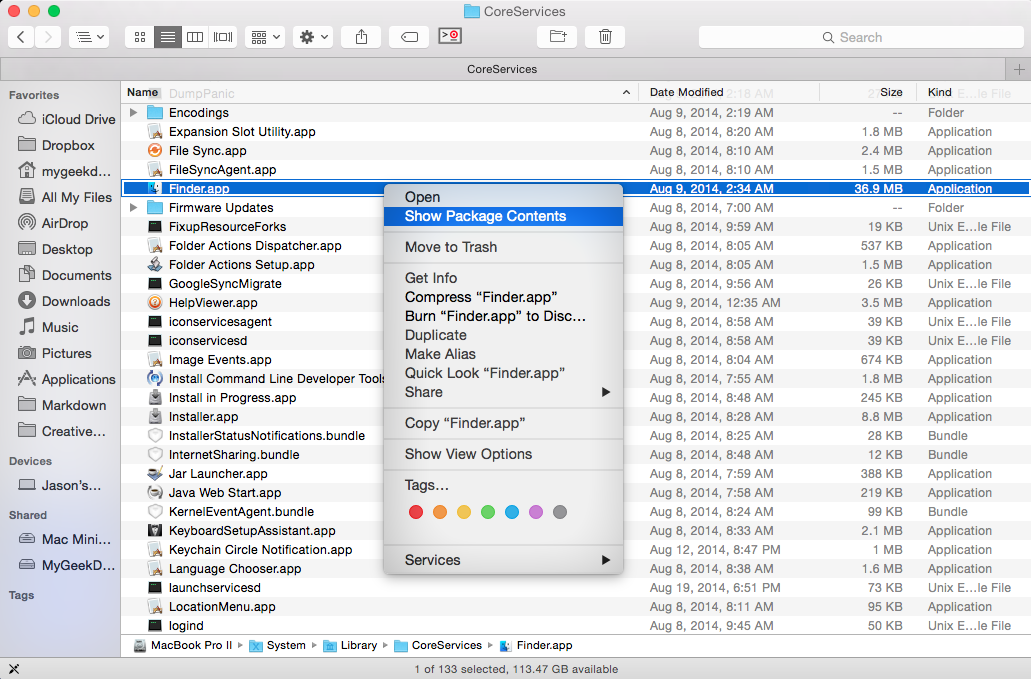
- The package contents of the Finder.app will open like it was a folder and show additional folders and files that make up the Finder.app application.
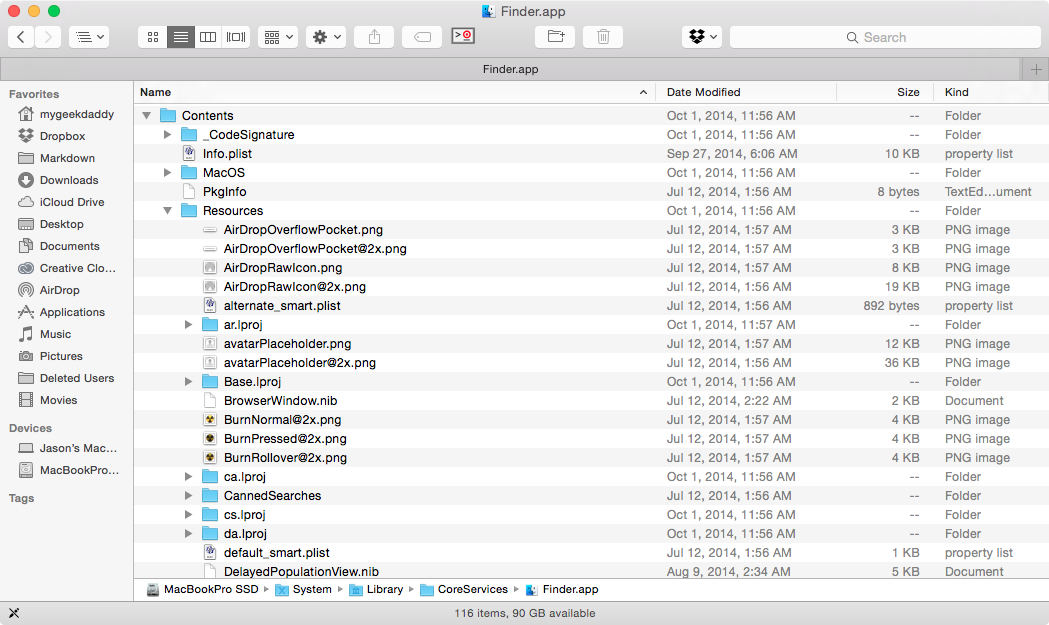
- Once the package contents are opened, navigate to “Contents/Resources/English.lproj” folder. 2
- Locate the file
InfoPlist.stringsfile. This is the file that contains the structure on how Finder.app sorts records.

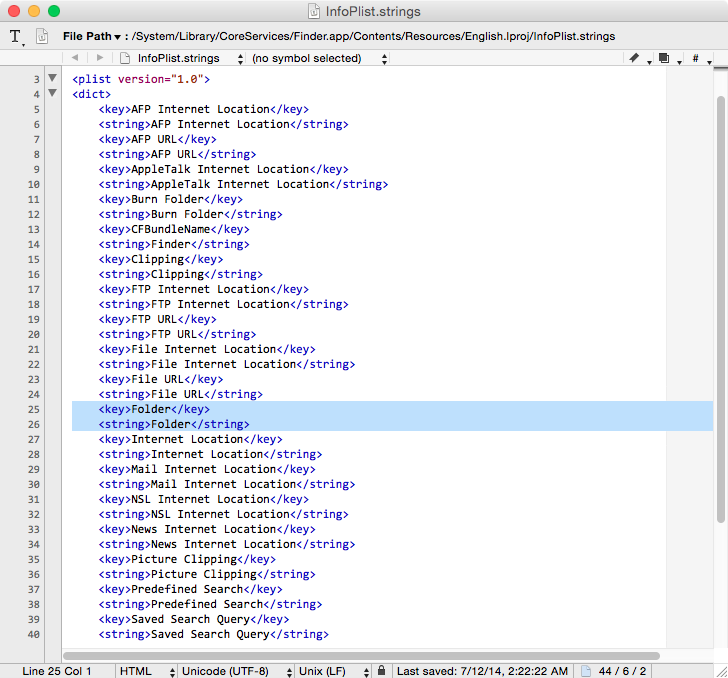
- Assuming you're using BBEdit, right click on the file and select BBEdit to edit the file. Note you may get a warning when you attempt to edit the Folder tag.

- Locate the "Folder" entry in the
InfoPlist.stringsfile and add a space to Folder string key.
Before:
After:

- Save the changes to the
InfoPlist.stringsfile and close BBEdit/Xcode tool. - Now to re-enable SIP, click the menu and select 'Restart...'
- As soon as your Mac starts to restart, hold down the Cmd-R keys to boot into Recovery mode.
- Click the 'Utilities' menu and select the Terminal command.
- Enter the following command in the Terminal windows:
csrutil enable. You will again be alerted that your Mac needs to restart for the change to take effect. - Click on menu again and select Restart.
- Allow the system to restart and log back in as normal.
Now after your Mac reboots, Finder.app will sort any Folders to come first when you sort by Kind. 3
Caveat on Sort Order:
In my previous post on updating Finder.app for OS Mavericks, I added an addendum on a problem a small percentage users were having with the steps above.
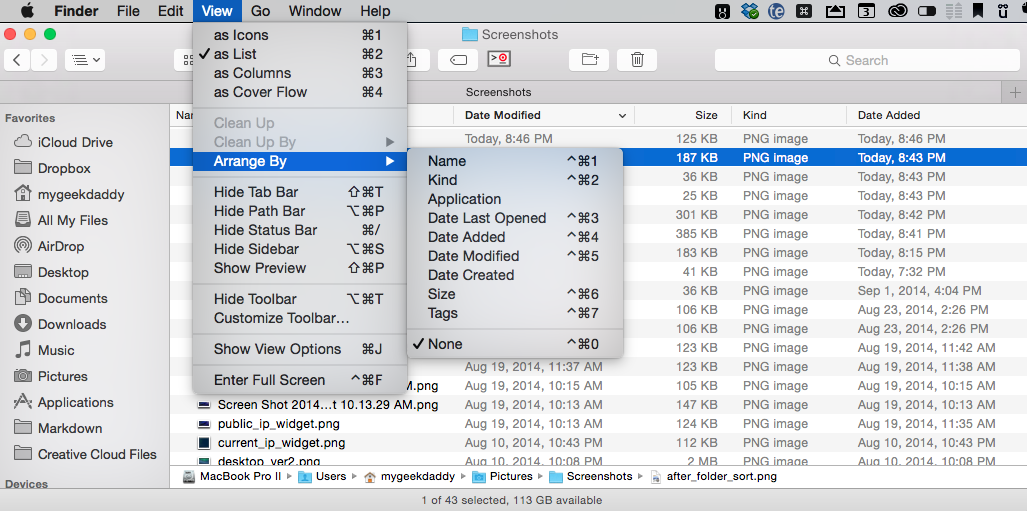
To ensure the sort order by 'Kind' will show Folders first, make sure the default Arrange By order should be None. The tags for other Arrange By sorts orders override the file tag changed in the steps above.
-
The changes discussed here shouldn't mess up your system, but wouldn't you feel better knowing you can just make a quick restore? ↩
-
This is the default for systems using English as the primary language. Look around for the correct folder if English is not the default. ↩
-
Yes these are the same images from Yosemite, but that's because results are the same too. ;-) ↩