
I've been able to convert a few more friends and family members to the Apple family. So I'm starting to get more questions on customizing their Apple device. One of my favorite customizations is adding spacers into my dock to help separate apps that I keep in my dock. So I'll start posting some of my favorite customizations.
I originally found this customization on Chris Pennington's (@cpenned) blog site, so I want to give credit to where I originally found the code. Plus I want to give a shout out to one of the sane people that place their dock on the left side too. 1
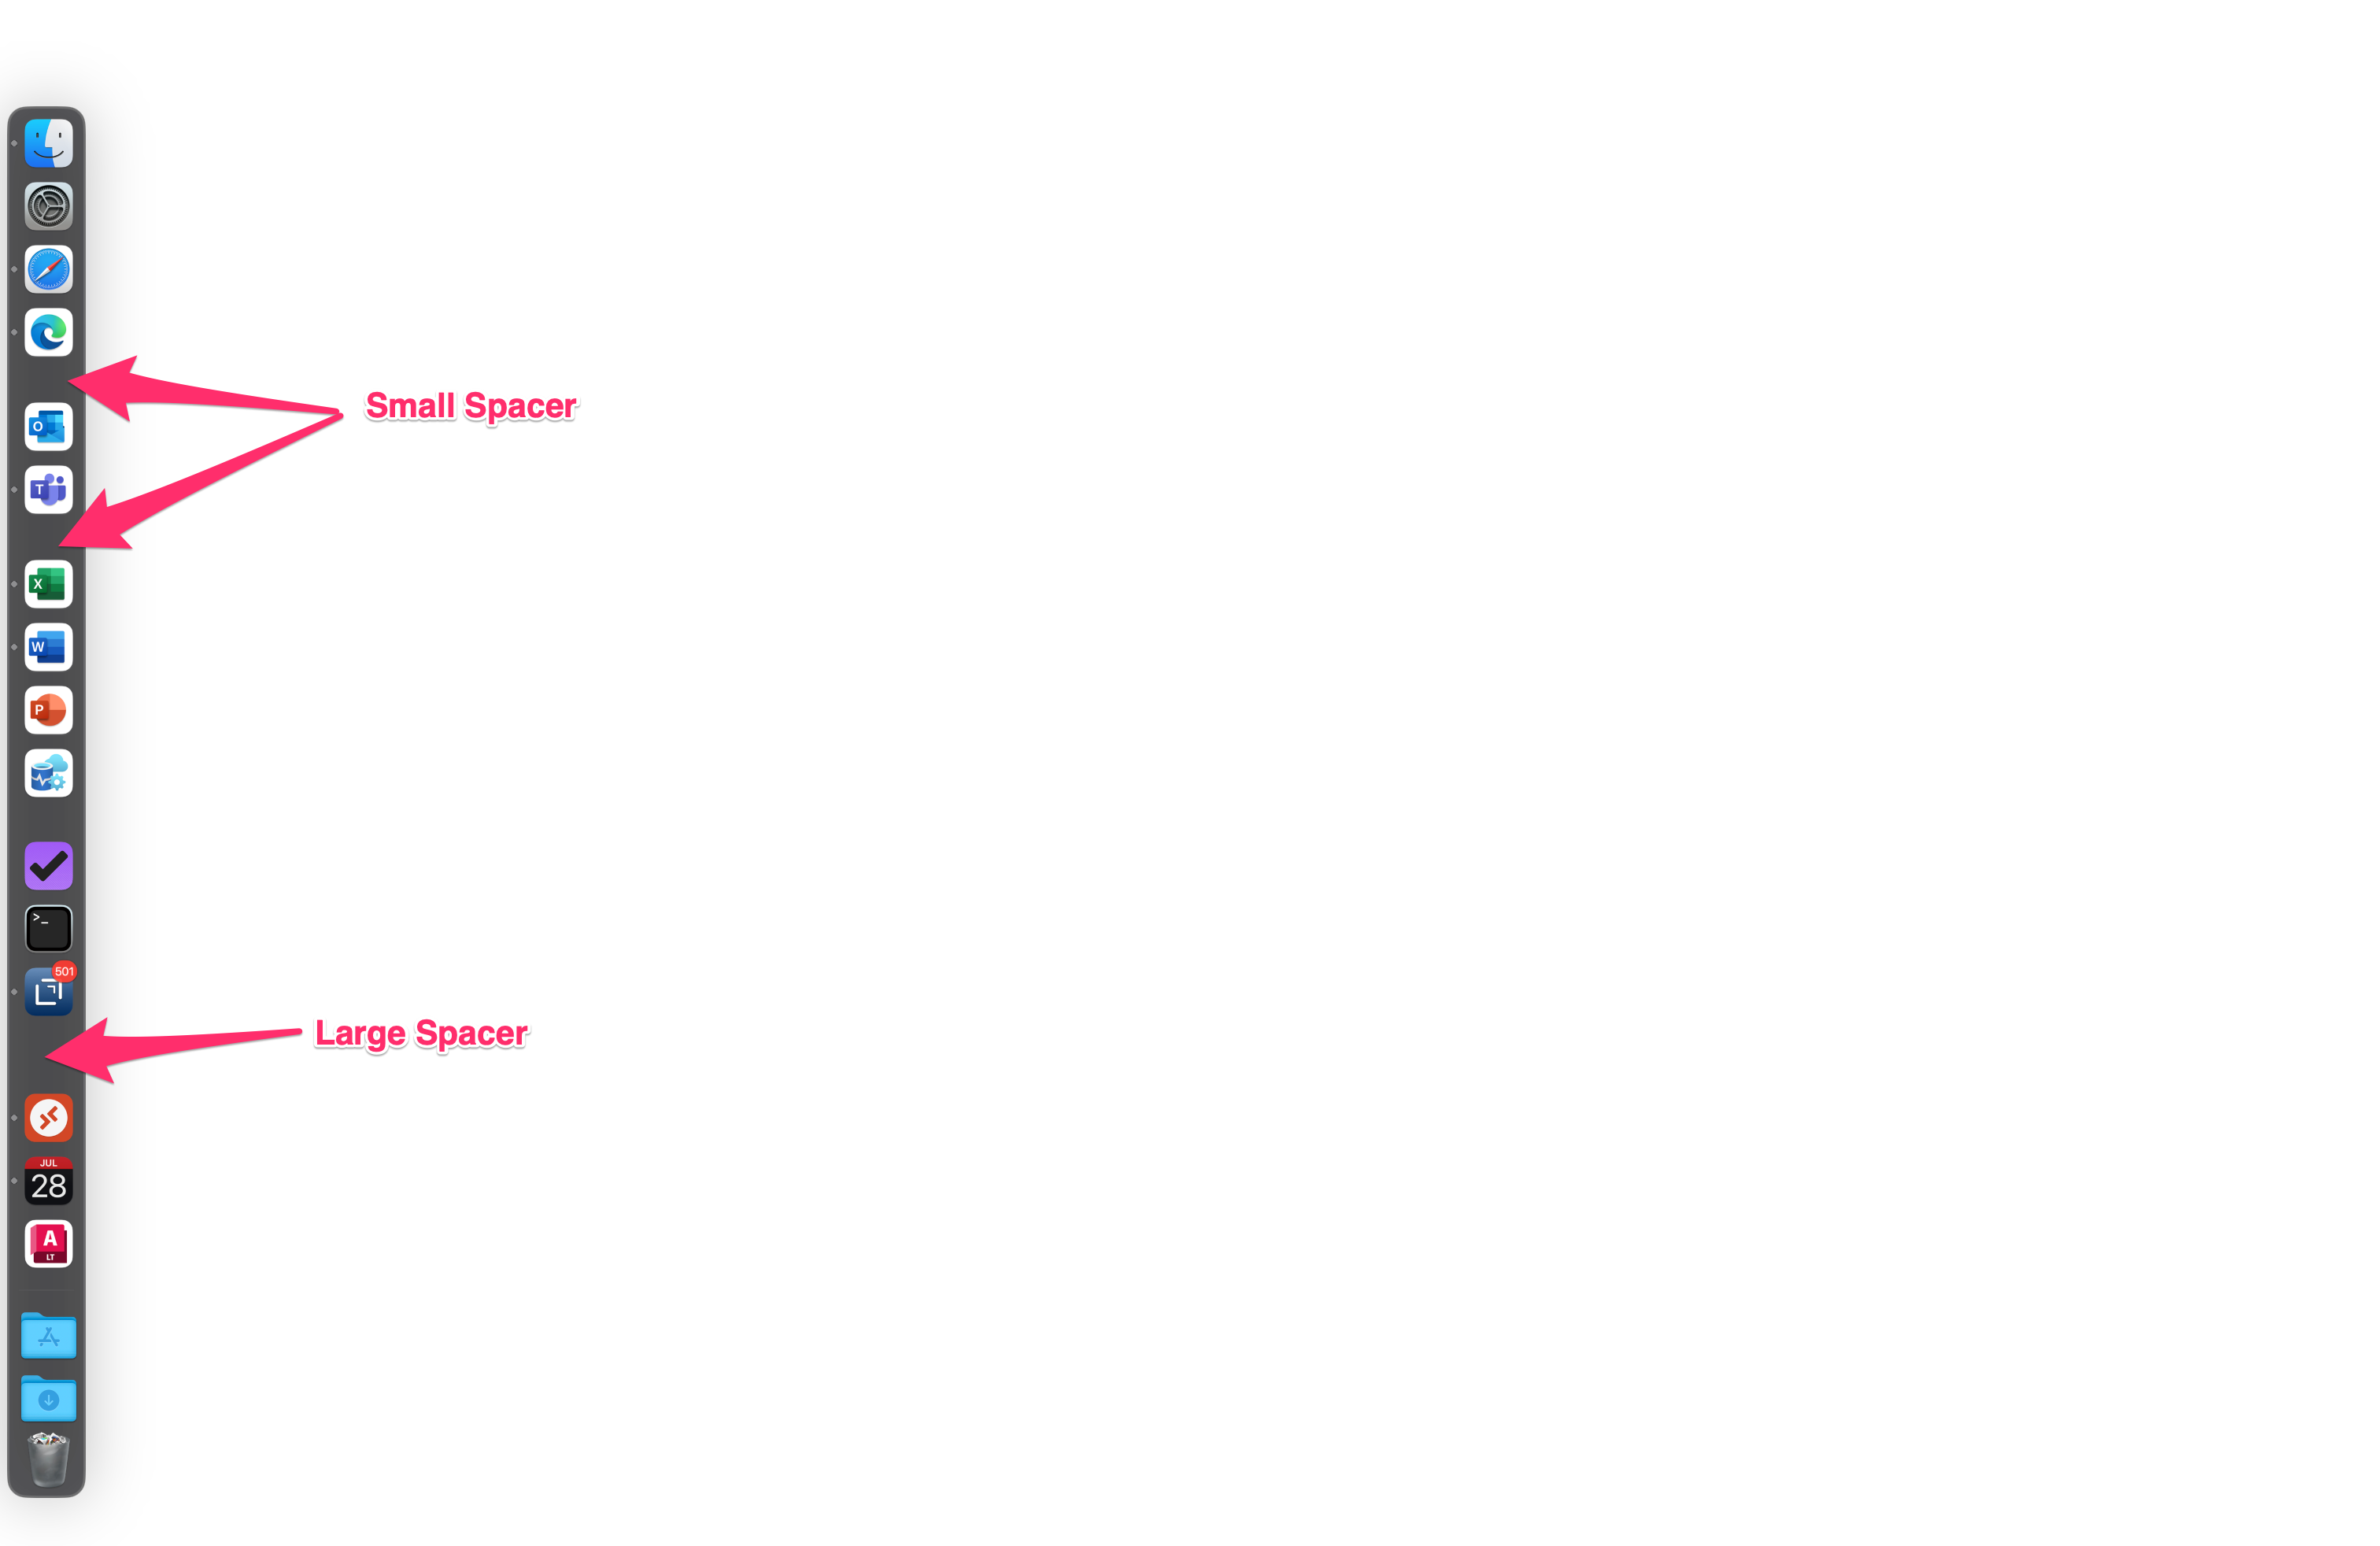
There are two sizes of spacers you can place on the Dock - Small and Large.
Code for Spacer
Each Spacer has a code snippet that you can copy/paste into a Terminal window.
Small Spacer:
defaults write com.apple.dock persistent-apps -array-add '{"tile-type"="small-spacer-tile";}'; killall Dock
Large Spacer:
defaults write com.apple.dock persistent-apps -array-add '{"tile-type"="spacer-tile";}'; killall Dock
Steps to apply Spacer
- Open the Terminal app.
- Choose spacer size you want to apply.
- Copy and paste the code from your choice above and hit
Return. - Open your Dock and move the spacer as needed.
You can just right click and select Remove from Dock to delete the spacer
-
Per Chris: My dock is on the left normally (the only correct choice 😏), but I rotated the screenshot so it wouldn't take up as much vertical space. ↩